Migrating a website to a new hosting provider can feel like moving to a new home: exciting but nerve-wracking. The fear of losing data, breaking your site, or facing downtime can make the process daunting.
Fortunately, with the right approach, you can seamlessly transfer your website to Bluehost—a reliable, user-friendly hosting provider—without losing a single byte of data.
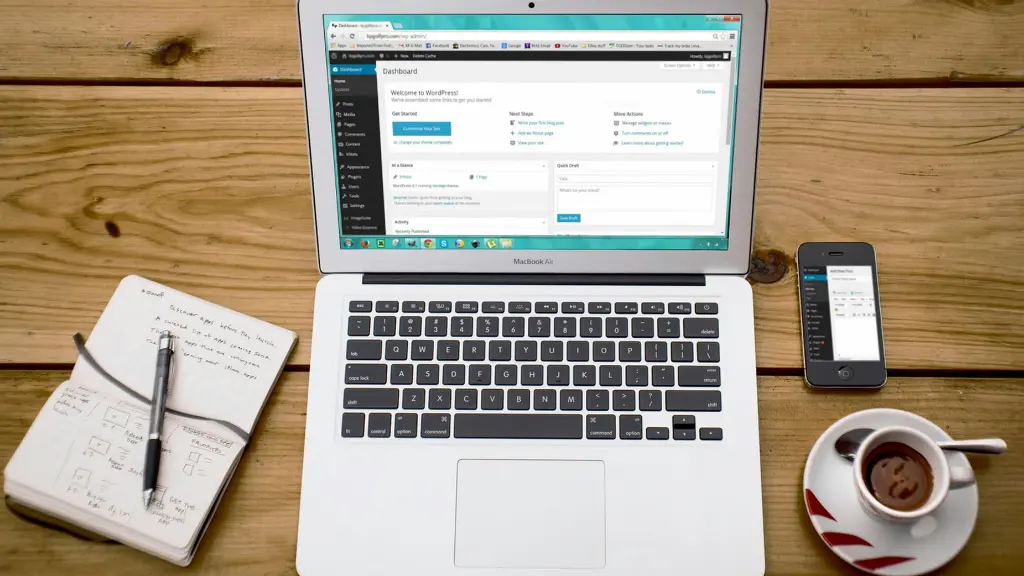
In this detailed guide, we’ll walk you through the entire process of migrating your website to Bluehost, step by step. Whether you’re running a WordPress site, an e-commerce platform, or a custom-built website, this guide covers everything you need to know to ensure a smooth transition.
We’ll also share tips to minimize downtime, avoid common pitfalls, and verify that your site is fully functional post-migration.
Let’s dive in!
Why Choose Bluehost for Your Website?
Before we get into the nitty-gritty of migration, let’s briefly explore why Bluehost is a popular choice for website owners. Bluehost is one of the leading web hosting providers, known for its:
- Reliability: Offers 99.9% uptime, ensuring your site is always accessible.
- Ease of Use: Features a beginner-friendly cPanel and one-click WordPress installation.
- Performance: Provides fast servers, free SSL certificates, and built-in caching for speed.
- Support: 24/7 customer support via chat, phone, and email.
- Affordability: Competitive pricing with plans starting as low as $2.95/month (as of 2025).
- Scalability: Suitable for small blogs, large e-commerce sites, and everything in between.
Bluehost is also officially recommended by WordPress.org, making it an excellent choice for WordPress users. Whether you’re migrating a blog, portfolio, or online store, Bluehost’s robust infrastructure ensures a smooth hosting experience.
Now, let’s move on to the migration process.
Preparing for Website Migration: The Pre-Migration Checklist
A successful migration starts with thorough preparation. Think of this phase as packing your belongings carefully before a move. Here’s a checklist to ensure you’re ready:
1. Assess Your Current Website
- Identify Your Platform: Is your site built on WordPress, Joomla, Drupal, or a custom framework?
- Check Storage Needs: Determine the size of your website (files, databases, and media).
- Note Dependencies: List any plugins, themes, or custom scripts your site relies on.
- Document Settings: Record DNS settings, email configurations, and third-party integrations.
2. Choose the Right Bluehost Plan
Bluehost offers several hosting plans, including:
- Shared Hosting: Ideal for small to medium websites.
- VPS Hosting: For sites needing more resources and control.
- Dedicated Hosting: For high-traffic or resource-intensive sites.
- WordPress Hosting: Optimized for WordPress sites with enhanced features.
Select a plan that matches your site’s needs. For most small to medium sites, the Plus or Choice Plus shared hosting plans are sufficient. If you’re unsure, Bluehost’s support team can guide you.
3. Back Up Your Website
A full backup is your safety net. If anything goes wrong, you can restore your site to its original state. Here’s how to back up your site:
- Files: Download all website files (e.g., HTML, PHP, CSS, images) via FTP using tools like FileZilla.
- Database: Export your database using phpMyAdmin or a similar tool.
- Emails: If your current host manages email accounts, back up emails using an email client like Outlook or Thunderbird.
- Plugins: For WordPress sites, use plugins like UpdraftPlus or Duplicator to create a complete backup.
Store backups in multiple locations, such as your computer, an external drive, and a cloud service like Google Drive or Dropbox.
4. Verify Bluehost Account Setup
- Sign up for a Bluehost account if you haven’t already.
- Log in to your Bluehost cPanel to familiarize yourself with the interface.
- Ensure your domain is either transferred to Bluehost or pointed to Bluehost’s nameservers (more on this later).
5. Inform Stakeholders
If your website serves customers, employees, or partners, notify them of potential downtime. Schedule the migration during low-traffic periods (e.g., late at night) to minimize disruption.
6. Test Your Backup
Before proceeding, verify that your backup is complete and functional. Restore it on a local server or a staging environment to ensure all files, databases, and functionalities work as expected.
With your preparation complete, you’re ready to start the migration process.
Step-by-Step Guide to Migrating Your Website to Bluehost
The migration process varies slightly depending on your website’s platform, but the core steps remain the same: transfer files, move databases, update DNS settings, and test everything. Below, we’ll outline the process with a focus on WordPress sites (the most common platform) and provide notes for other platforms where applicable.
Step 1: Set Up Your Bluehost Hosting Environment
- Log in to Bluehost: Access your Bluehost account and navigate to the cPanel.
- Install WordPress (if applicable): If you’re migrating a WordPress site, use Bluehost’s one-click WordPress installer to set up a fresh WordPress installation. This creates the necessary file structure and database.
- Create a Database: For non-WordPress sites, use the “MySQL Databases” tool in cPanel to create a new database and user. Note the database name, username, and password—you’ll need them later.
- Set Up Email Accounts: If your site includes email hosting, recreate your email accounts in Bluehost’s cPanel under “Email Accounts.”
Step 2: Transfer Website Files
Your website’s files include core files, themes, plugins, media, and configurations. Here’s how to transfer them:
Using FTP
- Download Files from Current Host:
- Connect to your current host via FTP using FileZilla or a similar client.
- Download the entire website directory (e.g., public_html for most hosts) to your computer.
- Upload Files to Bluehost:
- Connect to Bluehost’s FTP server using the credentials provided in cPanel.
- Upload the downloaded files to Bluehost’s public_html directory (or the appropriate directory for your domain).
- Verify File Integrity:
- Compare the number and size of files on your computer with those uploaded to Bluehost to ensure nothing was missed.
Using Bluehost’s File Manager
If you prefer a browser-based approach:
- Log in to Bluehost’s cPanel and open the “File Manager.”
- Navigate to public_html (or your domain’s root directory).
- Upload your zipped website files, then extract them using the File Manager’s “Extract” option.
Note for Non-WordPress Sites: If your site uses a different CMS (e.g., Joomla, Drupal) or is custom-built, ensure you upload configuration files (e.g., configuration.php for Joomla) and update any database connection settings after the file transfer.
Step 3: Migrate Your Database
Your database stores dynamic content like posts, pages, comments, and user data. Here’s how to transfer it:
- Export the Database from Your Current Host:
- Log in to your current host’s cPanel and open phpMyAdmin.
- Select your website’s database and click the “Export” tab.
- Choose the “Quick” export method and save the .sql file to your computer.
- Create a Database on Bluehost:
- In Bluehost’s cPanel, go to “MySQL Databases.”
- Create a new database and assign a user with full privileges.
- Import the Database to Bluehost:
- Open phpMyAdmin in Bluehost’s cPanel.
- Select the new database and click the “Import” tab.
- Upload the .sql file and click “Go” to import the data.
- Update Configuration Files:
- For WordPress, edit the wp-config.php file in your site’s root directory to reflect the new database name, username, and password.
- For other platforms, update the relevant configuration file (e.g., settings.php for Drupal).
Step 4: Update DNS Settings
To make your website accessible on Bluehost, you need to point your domain to Bluehost’s servers. This step involves updating your domain’s nameservers or DNS records.
If Your Domain Is Registered with Bluehost
If you purchased your domain through Bluehost or transferred it to Bluehost, the nameservers are already set correctly. Skip to Step 5.
If Your Domain Is Registered Elsewhere
- Find Bluehost’s Nameservers:
- Log in to Bluehost and navigate to the “Domains” section in cPanel.
- Note the nameservers, typically ns1.bluehost.com and ns2.bluehost.com.
- Update Nameservers at Your Domain Registrar:
- Log in to your domain registrar (e.g., GoDaddy, Namecheap).
- Navigate to the DNS or nameserver settings for your domain.
- Replace the existing nameservers with Bluehost’s nameservers.
- Wait for DNS Propagation:
- DNS changes can take 24–48 hours to propagate globally. Use a tool like WhatsMyDNS.net to monitor propagation.
Pro Tip: To minimize downtime, you can test your site on Bluehost before updating nameservers by editing your computer’s hosts file to point your domain to Bluehost’s server IP.
Step 5: Test Your Website
Before announcing your site’s migration, thoroughly test it to ensure everything works as expected:
- Preview the Site:
- Use Bluehost’s temporary URL (provided in cPanel) or modify your hosts file to view the site on Bluehost’s servers.
- Check Core Functionality:
- Navigate through pages, posts, and products.
- Test forms, search functions, and interactive elements.
- Verify that images, videos, and other media load correctly.
- Test Plugins and Themes:
- For WordPress sites, ensure all plugins and themes are compatible with Bluehost’s environment.
- Deactivate and reactivate plugins if issues arise.
- Verify Database Connections:
- Check that dynamic content (e.g., blog posts, user accounts) displays correctly.
- Test Email Accounts:
- Send and receive test emails to confirm email functionality.
If you encounter errors, consult Bluehost’s support team or check the error logs in cPanel for clues.
Step 6: Go Live and Monitor
Once you’re confident the site is working correctly:
- Update DNS (if not done earlier): Point your domain to Bluehost’s nameservers.
- Monitor Downtime: Use tools like UptimeRobot to track your site’s availability during DNS propagation.
- Check SEO Settings: Verify that redirects, meta tags, and sitemaps are intact to maintain search engine rankings.
- Test Again Post-Propagation: After DNS changes take effect, test the live site to ensure everything is functioning.
Step 7: Cancel Your Old Hosting (Optional)
Once you’ve confirmed the migration is successful and your site is running smoothly on Bluehost:
- Back up any remaining data from your old host.
- Contact your old host to cancel your account, ensuring you don’t incur unnecessary charges.
- Keep your backups for at least 30 days as a precaution.
Migrating a WordPress Site to Bluehost (Simplified Method)
For WordPress users, Bluehost offers a free migration service for eligible accounts, or you can use a plugin to simplify the process. Here’s how:
Option 1: Bluehost’s Free Migration Service
- Eligibility: Bluehost offers free migration for WordPress sites on certain plans (e.g., Choice Plus, Pro). Check with support to confirm.
- Process:
- Contact Bluehost’s support team via chat or phone.
- Provide your current host’s cPanel or FTP credentials.
- Bluehost’s team handles the file and database transfer, typically within 1–3 business days.
- Pros: Hassle-free, no technical expertise required.
- Cons: May take longer than manual migration.
Option 2: Using a Migration Plugin
Plugins like Duplicator, All-in-One WP Migration, or Migrate Guru streamline WordPress migrations:
- Install the Plugin:
- On your current host, install and activate a migration plugin.
- Create a Migration Package:
- Use the plugin to export your site, including files and databases, into a single file.
- Upload to Bluehost:
- Test and Update DNS:
- Test the site using Bluehost’s temporary URL.
- Update your domain’s nameservers to point to Bluehost.
Recommended Plugin: Migrate Guru is particularly user-friendly and optimized for Bluehost migrations.
Common Migration Pitfalls and How to Avoid Them
Even with careful planning, issues can arise. Here are common pitfalls and solutions:
- Incomplete Backups:
- Problem: Missing files or database tables can break your site.
- Solution: Double-check backups before starting and test them in a staging environment.
- Database Connection Errors:
- Problem: Incorrect database credentials in configuration files.
- Solution: Verify database name, username, and password in wp-config.php or equivalent files.
- Broken Links or Missing Media:
- Problem: File paths may change during migration.
- Solution: Use a search-and-replace tool (e.g., Better Search Replace for WordPress) to update URLs in the database.
- DNS Propagation Delays:
- Problem: Visitors may see the old site or an error during propagation.
- Solution: Lower your domain’s TTL (Time to Live) a few days before migration to speed up propagation.
- Plugin/Theme Incompatibility:
- Problem: Some plugins or themes may not work on Bluehost’s servers.
- Solution: Test plugins/themes in a staging environment and update to the latest versions before migrating.
Post-Migration Optimization Tips
After migrating, optimize your site to take full advantage of Bluehost’s features:
- Enable Caching: Use Bluehost’s built-in caching or a plugin like WP Rocket to improve site speed.
- Install an SSL Certificate: Bluehost provides free SSL via Let’s Encrypt. Enable it in cPanel to secure your site.
- Set Up Backups: Configure automatic backups through Bluehost’s Jetpack or CodeGuard services.
- Monitor Performance: Use tools like Google PageSpeed Insights or GTmetrix to identify areas for improvement.
- Update Security: Install a security plugin like Wordfence (for WordPress) and enable Bluehost’s SiteLock for added protection.
FAQs About Migrating to Bluehost
How long does it take to migrate a website to Bluehost?
Manual migration typically takes 2–6 hours, depending on site size and complexity. Bluehost’s free migration service may take 1–3 days.
Will my site experience downtime during migration?
With proper planning (e.g., testing before DNS changes), downtime can be minimal or nonexistent. DNS propagation may cause temporary inconsistencies.
Can I migrate a non-WordPress site to Bluehost?
Yes, Bluehost supports various platforms. Follow the manual migration steps for files and databases, and consult Bluehost support for specific CMS guidance.
What if I encounter errors during migration?
Check error logs in cPanel, verify configuration files, and contact Bluehost’s 24/7 support for assistance.
Is Bluehost’s free migration service reliable?
Yes, it’s reliable for WordPress sites, but manual migration gives you more control and is faster.
Conclusion
Migrating your website to Bluehost doesn’t have to be stressful. By following this step-by-step guide, you can transfer your site without losing data, minimize downtime, and ensure a smooth transition. Whether you choose manual migration, a plugin, or Bluehost’s free service, preparation and testing are key to success.
Bluehost’s reliable hosting, user-friendly interface, and robust support make it an excellent choice for websites of all sizes. Once your site is live on Bluehost, take advantage of its performance and security features to enhance your online presence.
Ready to get started? Sign up for Bluehost, back up your site, and follow the steps above to migrate with confidence. If you run into challenges, Bluehost’s support team is just a click or call away.
Happy migrating!